Foodbuzz

Search This Blog

*All recipes on this blog (unless otherwise noted) are Martha Stewart's from the Everyday Food Cookbooks here and here, they are not my own. If other than this I will post links to the recipes or indicate that they are originals*

Tuesday, August 24, 2010

More homemade noodles...lasagna!

I'm so excited about my new pasta skills...ok well really I can't take the credit because the kitchen aid does all the work.  This lasagna looks like your average lasagna, but inside it are homemade wheat lasagna noodles.  How cool is that!???  I was a little nervous about how the wheat noodles turned out, but they are delicious!  This lasagna was VERY simple, but honestly one of the best "plain" lasagnas I've ever had, Logan agrees.  I was definitely craving a down home hearty meal and got it with this one.  There's nothing better than a good lasagna and a big glass of milk!  Try this one...even if you don't have homemade noodles! :)
ENJOY!
Oh and FYI I halved this recipe and we still had lots of leftovers.  

Vegetable Lasagna
32 oz ricotta cheese (4 cups)
2 large eggs
S&P
2 packages frozen chopped spinach, thawed
6 cups basic tomato sauce (homemade or store bought)
12 no boil lasagna noodles 
4 cups shredded fontina cheese

Preheat oven to 400.  Whisk together ricotta, eggs and 1/2 tsp salt + 1/4 tsp pepper.  Squeeze spinach to remove as much liquid as possible, add to ricotta mixture; stir well to combine.

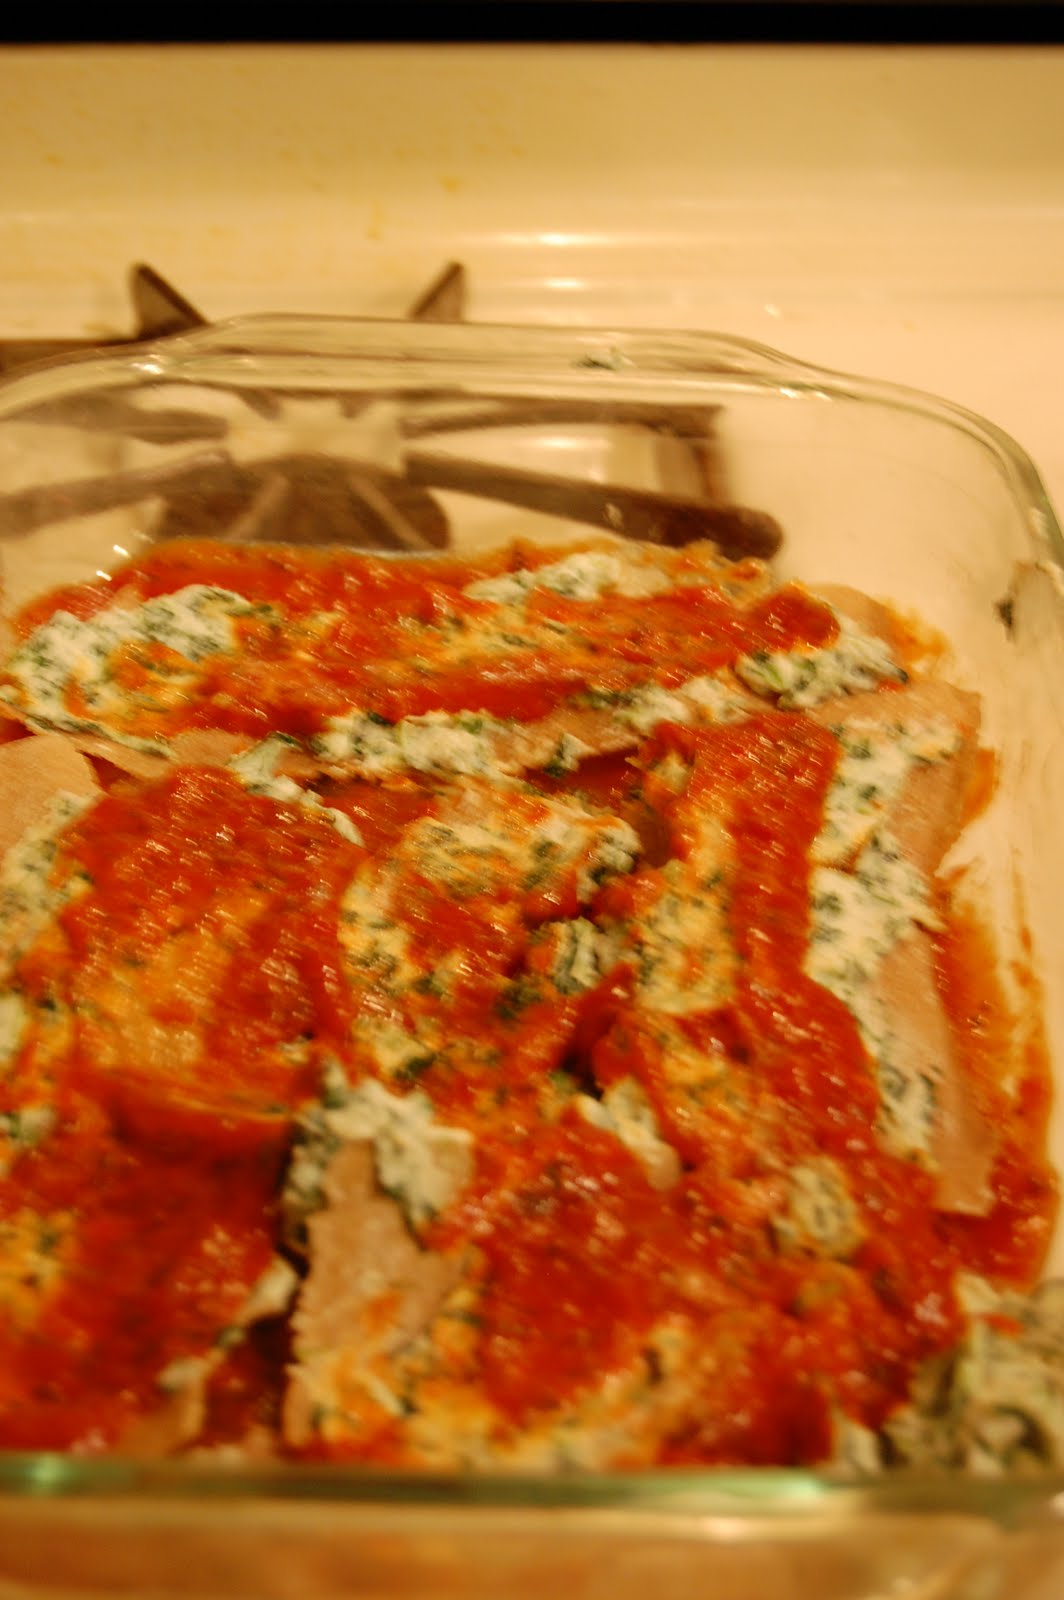
Spread a thin layer of tomato sauce in bottom of 9x13 in baking dish.  Arrange 4 noodles (or more if necessary) on top.  

Spread 1/3 ricotta mixture over noodles, followed by one third of the remaining tomato sauce.

Sprinkle with one third of fontina cheese.

Repeat to make 2 more layers, ending with fontina cheese on top. 
Cover with foil, bake 30 min (if frozen 40 min).  Remove foil, continue cooking until golden brown on top, about 15 min more.  Let cool slightly before cutting into squares and serving. 

Serves 8.

Logan Rating: ****

We love Curry!

Do you love curry?  Because WE DO!  I think curry is one of our favorite things to eat, not that it always agrees with us, but that's just a minor detail.  This beef curry was made with free range beef from our farmers market and let me tell you there is NO comparison to the crappy meat we have bought in the past.  For many reasons I don't buy "normal" meat anymore, but taste/texture is definitely one of them.  
Hey Dug/Candy do you recognize those chop sticks?  We use them any time we have an asian meal, it makes us feel authentic :)
Ok so long story short this is a good one, really you have to try it.  However a quick note for you on this one, add extra curry paste.  I added about 1/2 T extra and it still wasn't quite enough kick for us.  I also would choose rice next time, because these rice noodles didn't soak up the flavor as I would have hoped.  MMMMM this one is delicious!  Hope you ENJOY!

Coconut and Beef Curry with Noodles
S&P
8 oz vermicelli (rice noodles)
2 T veg oil
1 lb beef sirloin, cut into thin strips
1 red onion, halved lengthwise and thinly sliced
2 red bell peppers
1/4 cup water ( next time I might not add this water)
1 T Thai red curry paste
1 can unsweetened coconut milk 
1 cup packed fresh basil leaves
1 T fresh lime juice

Bring a large pot of water to boil; add salt.  Cook noodles until tender according to package directions. 
Meanwhile, in a large skillet, heat 1 T oil over med high heat.  Season beef with S&P, add half the beef to skillet.  Cook until browned on one side 1-2 min.  Transfer to plate, repeat with remaining beef. 

Add onion, bell peppers and water to skillet; season with S&P.  Cook stirring occasionally until veggies are tender, 3-4 min.  Add curry paste; cook stirring until fragrant, about 1 min. 

Return beef to skillet; add coconut milk.  Simmer until sauce thickens, about 4-5 min.  Remove from heat.  Stir in basil and lime juice and season with S&P.
Serves 4. 

Serve over noodles.

Logan Rating: ****

Breakfast Smoothie!

So, are you a smoothie person?  I guess I should be, since I have the magic bullet blender and smoothies are one of its specialties.  But I really don't make them very often.  Every time I do make one I think to myself, why don't I do this more often?  What do you think it is, time, or maybe the fact that its a liquid meal.  Maybe a combo of both, who knows...anyway this smoothie was EASY, as most are.  But I won't lie it is a bit different.  At first I didn't think I liked it, but the more I drank the better it got.  And by the time the smoothie was gone, I again thought, I have to do this more often.  So who knows, maybe I will be making these before school...I'll let you know.  Oh and just a quick note, I used vanilla yogurt in place of plain because I LOATHE plain yogurt, how can anyone eat that stuff???

Banana Oat Smoothie
1/2 cup old fashioned oats
1 cup plain yogurt
2 ripe bananas cut into thirds
1 cup milk
4 tsp honey
1/2 tsp ground cinnamon

Combine all ingredients into a blender and blend until smooth.
Makes 2.


Logan Rating: ***

Stir Fry

Ok I'm sorry for the absence for the last couple of days, I have been cooking though so I have a few recipes to share with you all.  This first one is a chicken stir fry, which is definitely a good staple meal.  With a large amount of fresh Thai basil from the farmers market and rice wine vinegar, this was not your average stir fry, which was a really nice change.  If I ever get done with this challenge (2 years from now) I will make this a staple meal for sure, because wow was it easy and pretty delicious.  I served it with some brown rice, but you could serve it with any kind of Asian noodle or even sans carbs if you like that sort of thing.  Hopefully you are all having a good start to your week, all 11 of you! :)
ENJOY!

Chicken and Basil Stir Fry
1 1/2 lbs boneless skinless chicken cut crosswise into 1/4 in slices
1 T cornstarch
S&P
6 tsp veg oil
1 small onion, halved lengthwise and cut into 1/4 in pieces
2 bell peppers, sliced
6 garlic cloves, minced
1/4 cup water
2 T rice wine vinegar
2 T soy sauce
1 1/2 cups fresh Thai basic, larger leaves torn in half

Pat chicken dry, toss with cornstarch; season generously with S&P.
In a large skillet, heat 2 tsp oil over medium high heat.  Cook half the chicken, until browned, but not completely cooked through, 2-3 min.  Transfer to plate and repeat with other half of chicken, transfer to plate.

Wipe skillet clean with a paper towel and add remaining 2 tsp  oil, along with onion and bell peppers, cook until veggies begin to brown, about 3 min.  Add garlic, cook stirring until fragrant, about 1 min.

Add water, vinegar, soy sauce, and chicken; cook tossing until chicken is cooked through, about 1 min.  Remove from heat and stir in basil.  Serve over rice or noodles.

MMMM Thai basil, SO GOOD!
(If you can't find it, just use regular basil, it'll still be delicious)
Serves 4.

Logan Rating: ***

Saturday, August 21, 2010

More grilling...Classic Cheese Burgers!

This is a recipe that we have been looking forward to trying for a while now.  I'm always looking for burger recipes for the summer time, and this one is certainly a classic, as its name will tell you.  I like this recipe because it doesn't have all the bells and whistles, its just a hamburger and a delicious one at that.  The recipe calls for these burgers to be cooked under the broiler, but we grilled them, because ITS SUMMER PEOPLE!  Well at least it will be for ONE MORE WEEK!  I paired this burger with sweet potato fries and grilled corn on the cob, but the burger was filling enough to eat on its own for sure.  I also topped the burger with caramelized onions, cheese, pickles, lettuce and ketchup and mustard.  DELICIOUS!  The sweet potatoes were also really good, have a little kick with the cayenne which really gives them that extra something.  I absolutely love sweet potatoes and just about everything that they can be made into.  So if you need a go to burger here it is, its about as simple as they come and it turned out absolutely awesome, it reminded me of an old fashioned diner burger.  MMMMM!
ENJOY!

Old Fashioned Cheeseburger
1 lb ground beef chuck 
4 hamburger buns
4 tsp unsalted butter
S&P
4 slices cheese, american or mild cheddar
Assorted Toppings

Heat broiler, divide meat into four equal parts and gently pat into a ball.  Place each between two layers of plastic and wrap.  Using a rolling pin, roll out beef to 1/4 in thick patties.
Spread bun halves with butter, place on baking sheet, buttered side up, lightly toast under broiler.
Heat a large skillet or griddle over high.  Generously season patties on both sides with S&P.  Working in batches cook patties 1-2 min.  Flip and top with cheese, cook 1-2 min more or until cheese is melted.  Place burgers on buns and top with desired toppings. 
Serves 4.

Roasted Sweet Potato Fries
3 medium sweet potatoes (1 1/2 lbs)
1 T olive oil 
1 tsp ground cayenne
S&P
Preheat oven to 425.  Halve sweet potatoes crosswise, quarter each half lengthwise.  On a large baking sheet, toss with oil and cayenne and season with S&P.  Arrange potatoes cut side down in a single layer.
Roast, turning halfway through, until fork tender, about 40 min.
Serves 4. 

I didn't take that many pics, so here they are all together. 


Logan Rating: ***
He says "It was really good, but nothing special" 
haha I think his standards are increasing! :)

Friday, August 20, 2010

HOMEMADE PASTA!!!!!!!!!!!!!!

That looks like professional pasta doesn't it??? OH YEAH!  That's right folks, I, Paige Cashman made my very own homemade PASTA!  There have been a lot of cooking firsts for me lately, how exciting!  So about a month ago I received a package in the mail which contained my very own kitchen aid pasta making set.  This package was sent from my mom, but the gift was from my uncle Dug who had this in his kitchen but had never used it.  THANKS DUG!!!!  I finally got around to trying it out and OH MAN is it ever fun AND easy!   I would have never dreamed it would be so easy to make homemade pasta, thanks Kitchen aid!  So I will include the pasta dough recipe in here as well as the recipe for this amazing linguine and sausage pasta, which was seriously to die for. 
Ok so while pasta making with this tool is SUPER easy, I did make one mistake that I will warn you about.  The first time I made the linguine noodles I did not lay them out flat to dry and therefor they stuck together and then I made another mistake in putting them into hot water BEFORE it was boiling and they basically turned into one big mush.  So I then made a second batch, in less than 10 min, of white pasta, fixed the mistake and they were perfect!  
Here is the recipe and some pics of my first pasta making experience!
Wheat Pasta
21/2 cups wheat flour
1 cup all purpose flour
4 eggs
2 T water
1/2 tsp salt

White Pasta
2 cups all purpose flour
2 eggs
4 T water (more or less as needed)


Mix all ingredients together in kitchen aid mixer.  If too wet add flour, if too dry add water.  The dough should stick together when pinched between two fingers, but should not stick to your fingers.  Divide dough into 8 balls.  Flatten one ball to about 1/2 in thick and feed through your pasta roller (set on number 1).  The first time it will seem like its not working, thats because you are basically kneading the dough and the gluten needs to break down in order to become a smooth dough.  Run the dough through (folding in half after each time) at least 5 or 6 times.  After it looks like a smooth sheet of pasta, switch the setting on your roller to 3 and run dough through once.  Depending on what kind of pasta you are making will determine what thickness you want.  For linguine after number 3 you will change setting to 5 and run through once.  For lasagna you would go one more time through a 6 setting.  There are instructions regarding this that come with the set.  Now change out your pasta roller and put in the linguine cutter, feed each sheet of pasta through the cutter, TADAH PASTA!  Now MAKE SURE you catch the pasta as it comes out and lay it flat onto a baking sheet or dish towel to dry.  There are also really great youtube videos explaining this exact process so check those out if you are having trouble. 


Linguine with Sausage and Peppers
S&P
1 lb linguine
1 lb turkey sausage
6 garlic cloves
4 yellow peppers (I only used 2 and it was plenty)
4 tablespoons butter (I only used 2)
4 cups arugula (I used spinach)

In a large pot of boiling salted water, cook pasta until al dente.  Drain, reserving 1 1/2 cups pasta water.

Meanwhile, cook sausage and 2 T water in large covered skillet over medium for about 5 min.  Uncover; raise heat to med-high.  Brown the sausage breaking it up, about 7 min.  

Add garlic, bell peppers, and 1/4 cup pasta water; cook until peppers are soft about 6 min.  Add 3/4 cup pasta water and butter, swirl to combine.
Transfer to pot.  Add arugula; season with S&P.  Toss; add more pasta water as desired.

Serves 6.

Logan Rating: *****

Thursday, August 19, 2010

Still Cooking...seafood!

I feel like I'm back on track with this blogging thing and then in one week I'll be off jet setting again and then school starts, ugh hopefully I can keep this up.  If the meals continue to be this quick and easy, I'm sure I can. This one was especially quick and I swear even a "spaghettios only cook" could do it.  It took me less than 20 min to complete the whole meal and took really no skill at all.  I absolutely love chili powder, it adds such a nice smoky bite to this dish.  Make sure to try the corn salsa with the fish, it really helps round out the flavors! ENJOY!

Chili-Rubbed Salmon with Zucchini and Sauteed Corn
4 Skinless Salmon fillets (6oz each)
S&P
2 tsp chili powder
1 lb medium zucchini, quartered lengthwise,cut crosswise into 3 in spears
1 T olive oil
10oz frozen corn
1 garlic clove
1/2 cup chopped scallions
1 cup prepared fresh tomato salsa
Lime wedges, for garnish (optional)

Heat broiler, set rack about 4 in from heat.  Rub salmon all over with s&p.  Arrange on rimmed baking sheet; sprinkle top of fillets with chili powder.  Arrange zucchini around salmon and sprinkle with remaining chili powder and season with S&P.
Broil until fish is opaque throughout and zucchini is tender, about 8-10min.

Meanwhile heat oil over high heat in a skillet.  Add corn and garlic, cook, tossing until corn is tender and beginning to brown, about 5 min.  Remove from heat and stir in scallions and salsa, season with S&P.

Serves 4.

Logan Rating: ****


Wednesday, August 18, 2010

Back to the challenge, food on the grill!

So back to the challenge.  I have had quite a busy month of August so far and the craziness is not over yet.  The soon to be in-laws were in town for about 5 days this past weekend and while I probably should have been cooking, we ended up doing a lot of eating out.  In my defense we were gone for the weekend as you know if you read the last post.  Well now I have less than 2 weeks left in the countdown to school and we are leaving for Florida to visit the in-laws next week.  YIKES, I'm nuts!  Anyway, I'm going to try to get some serious cooking done in the next week, before we head out AGAIN!  So this is the beginning of that, a very EASY grilling meal, which is definitely my go to this time of year.  This was exactly what we were craving last night and it was seriously so easy, I made it while watching the Twins game and I hardly missed a pitch.  Try it out and let me know what you think...before the snow falls and you can't grill anymore, its coming people!

Grilled Tuscan Chicken with Rosemary and Lemon
2 T chopped fresh rosemary or 1 T dried
1/4 cup olive oil
2 cloves garlic
S&P
1 chicken cut into 8-10 pieces (or you could use breasts or whatever you want)
1/4 cup fresh lemon juice

Heat grill to medium.  In a saucepan bring 1/3 cup water and rosemary to boil; remove from the heat cover and let steep for 5 min.  Transfer to blender; add oil and garlic season with salt and pepper.  Puree until smooth.
Combine chicken and rosemary oil in shallow dish and turn to coat.  Cover at room temperature for 15 min or overnight in fridge.  Remove chicken from marinade and place on the grill.  Cook basting frequently with lemon juice and turning as needed to prevent burning.  Cook 20-30 min.

Grilled Zucchini and Squash
2 zucchini
2 yellow squash
2 yellow peppers
1/4 cup olive oil
S&P
1/4 cup thinly sliced basil

Heat grill to medium.  Slice zucchini and squash 1/2 in thick on the diagonal.  Quarter the peppers and toss everything with olive oil and S&P.  Grill until tender 6-8 min per side, return veggies to bowl and toss with basil.
I actually used a grill basket to do these veggies, as you can see from the picture and I added an onion.  You could do any kind of veggies that you want, I though mushrooms would have been really good also. 

Enjoy this one, we did!

Logan Rating: ***


Wedding Pie!

Hello fellow bloggers!  I am back from a whirlwind weekend of fun.  Our GREAT friends Kate and Dave aka Mr. and Mrs. Whisenand were married just outside of Whitefish this past weekend and it was BEAUTIFUL!  We were so happy to take part in such an amazing celebration and we had such a wonderful time.  They did a very unique thing for their dessert, instead of a cake they had a few of their friends make pies and bring them along.  It fit perfectly with the outdoor MT themed wedding and they were all a HUGE hit.  I myself made a pie and well it was MY FIRST real pie experience and I'm very happy with the way things turned out.  I got the crust recipe from my friend Emily, who was a lifesaver because this recipe was so easy.  And I found the filling recipe online.  It turned out perfectly and it was actually quite easy, so I say GO make a pie all of you! :-)
I wish I would have had my camera at the actual wedding so I could have taken a picture of the pie table, it was absolutely beautiful!


The crust recipe is as follows...
1 cup flour
1tsp sugar
1/2 tsp salt
3 T ice water (must be ice water!!)
8T butter

Mix flour, salt, sugar in food processor.  Add butter and mix in food processor until a cornmeal consistency.  Add ice water and mix with hands until no too sticky/dry (add more flour or water if necessary).  Make into a ball and freeze in plastic for 10 min or refrigerate up to a week.
Roll out dough on floured surface to 2in larger than pie plate.  Drape over greased pie plate; press down to fit.  Here you could add fork designs if you aren't doing a top crust. 
Freeze for 10 min.
Prebake if filling is wet, otherwise follow pie instructions.
Repeat and make another ball of dough if you are doing a top crust. I made a braid around the edge, which I found the instructions to online as well.  

Filling recipe is from this website, she also lists a crust recipe that you could follow...

ENJOY!
As this is not a part of the actual challenge there is no logan rating and it does not count towards my number of recipes.  I was just really excited about it and wanted to share!!! :)